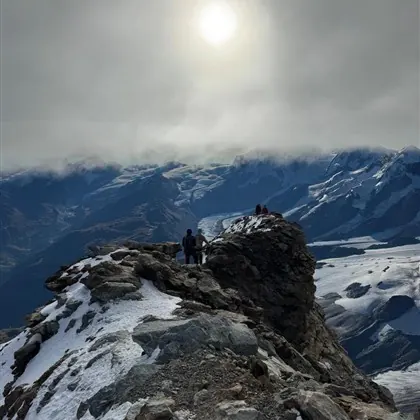
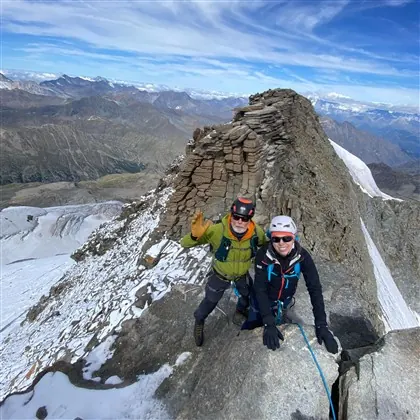
Ama Dablam’s South-West ridge is commonly climbed using seige tactics, meaning fixed ropes, camps, load carrying etc.
On all the technical sections there are fixed ropes for people to clip onto, and jumar up the steeper sections. Trying to put a conventional grade onto parts of the route is difficult, and although I have “freed” nearly all of the ridge, I have always done so clipped into a rope that has safeguarded my climb. You can’t have a true feel for a grade until you have led a pitch traditionally, something very, very few of Ama Dablam’s climbers will do.
What follows therefore is a description of Ama Dablam’s south-west ridge, without any technical climbing grades but it should give you an idea of what to expect on the different and contrasting parts of the climb.
A note on the fixed ropes:
At the start of every season (commonly post-monsoon, October – November) many sections of rope will have been removed or hidden in the snow and ice by the glaciers relentless movement. The first few teams of the season normally pool resources to fix these sections, with the snow and ice above camp 3 being the most common part to have NO rope early in the season.
A few teams will use the ropes until camp 3, and climb “Alpine Style” from here until the summit.
A lot of the fixed rope is thin (8.5mm – 9mm) polypropolene , 3 strand rope. Something you’d only use for a static, fixed line rather than lead climbing. Climbing rope of varying thickness is often supplemented alongside these lines, meaning that you are clipped into more than one line.
Rope is fixed onto snow stakes, pitons and the usual threads, spikes etc. Single anchors at the end of a pitch are very common. There are about eight or nine bolts between camp 1 and 2.
There have been very few cases of fixed line snapping, but anchors have failed, normally on the easier traversing sections when rope is fixed onto loose terrain and a great deal of force is applied to the anchors when someone takes a fall.
On the “Yellow Tower” there are a few pitons in place that you could use as “runners” if you were the first person up that season and wanted to protect yourself as you jumared this crux section. otherwise the route is bare of runners, and if there were no fixed ropes at all you would have to climb these sections traditionally.
The approach to Advanced basecamp.
The walk from basecamp (4600m) to high camp or ABC follows a well worn track up a moraine ridge north east of the traditional basecamp. There are cairns along the way. It is a bit of a slog if your new to Himalyan climbing, but in reality the path is good and you soon gain height. The track curves around behind the SW ridge and ABC is just out of sight of basecamp itself.

ABC is around (5450m) and has quite a few tent platforms constructed in the moraine. There is normally to snow or running water here, so you’ll have to have some from basecamp or collect water from the glacial lake about 50mins walk away to the north East. Some teams skip ABC altogether and go to camp 1. You will have to decide if your acclimatisation and fitness will allow your team to do this.
ABC to Camp 1
The path winds it’s way up from Camp 1, soon disappearing into the dreaded boulder field below Camp 1. There are some large boulders to negotiate and cairns mark the way. it is quite easy to get off route, staying high is normally the best bet. When you get into view of camp 1 you should see the slabs leading up to it, which normally have some fixed rope hanging down this section.

There is some loosed scree lying on the slabs so be aware of people above you, and put a helmet on. The slabs are quite straightforward, and the fixed ropes can be jumared.
Camp 1
Tent spots are limited and are dramatically perched near the ridge which has a steep drop to the south. No running water at this altitude, and the snow cover varies depending on the year. You can normally find some further down the ridge on the shady north side, but be careful, no fixed rope and quite exposed. There is no designated toilet, and the whole place can get unpleasant later in the season.

Camp 1 is around 5750m.
Camp 1 to Camp 2
This is where the real climbing begins. The height difference between the two camps isn’t huge, but there is a great deal of technical ground to cover in a rising traverse as you follow the ridge. After some scree walking away from camp 1 the ground steadily rises up in a series of steps, protected by the fixed rope of course. Soon you reach some slabby, but steep, ground where many people make full use of the fixed rope by hanging from it as they move across the traversing section. This area is very slow under any snow as it becomes slippery on the sloping footholds. Two sections of up climbing require a jumar to protect yourself and are normally abseiled in descent. This leads to more traversing, and some snow or mixed sections (crampons not normally required) and to the bottom of the yellow tower.

The Yellow Tower is the crux of the route from a technical point of view and is a very spectacular piece of climbing. Exposed, and vertical at it’s top and around 25 – 30 meters long. there are normally two or three thicker ropes hanging down, which are fixed to good anchors at the top. Two jumars are useful for this section. Rucksacks can be hauled if needed.
Five minutes after the tower lies Camp 2.
Camp 2
Camp 2 sits at around 6000m on the only flat (ish) ground on this part of the ridge. It is very small and exposed and the tents are normally tied onto the mountain. There is room for around five or six small tents. Sometimes a little more but that’s about it. Tents are quite often shared between expeditions and you will have to time your stay so that there is space, or a tent, available.

Snow is available close by. Can be windy as it’s more exposed than the sheltered Camp 1. Don’t fall of the ridge going to the toilet.
The Grey Tower
After a section of mixed ground and snow (crampons on now) comes the grey tower. This area of broken slabs are around 200m high and are mixed (snow and rock) in nature. There is a bit of loose rock here and there. It’s not two jumar territory, but it is fairly steep scrambling/climbing in big boots.
The Mushroom Ridge
When you leave the rock of the Grey Tower and move onto pure snow you know that your not far from the Mushroom Ridge. This superb section of the route is a airy walk which varies year to year. The fixed lines run the most efficient way. You need to be steady on your crampons and steady in your mind as you tip toe along the crest. Brilliant!

Camp 2.8
At the far end of the ridge, just before you start climbing upwards again lies camp 2.8. There is a tiny spot underneath an ice “mushroom” that if you dig and improve the platform you can squeeze two or three small two man tents. Protected from the wind and falling serac debris from the “Dablam” above camp 3. This tent spot of 2.8 is normally full, and you will have to negotiate with the teams that have the tents in place. Plenty of snow (!), don’t fall off when your going to the loo.
Camp 3
A hundred meters or so above the Mushroom ridge is a little flat glacial plateau of Camp 3. At 6400m it’s the perfect platform for a summit attempt. However, it is very exposed to the wind from both sides and therefore cold as well. It also sits below, and slightly to the side of the “Dablam”, the serac that gives the mountain it’s name.

Every year the Dablam changes in appearance, and therefore in apparent danger. It has been the site of a tragic accident in the past, so if your going to use it, be sure that the Dablam is as safe as it can be, and you’ve thought through the other summit day options.
Camp 3 to the Summit
This last grind to the top changes from year to year due to the movement of the glacier itself. Mostly straightforward snow climbing, it can have a steeper passage as you climb around the side of the Dablam serac itself. Patches of bullet hard blue ice can appear, which makes it harder and slower so if you find pure snow all the way to the top then consider the route in good condition. All though technically the easiest part of the mountain, the altitude will make it feel harder, so grit your teeth and keep on moving upwards…


 Last-Minute Bookings & Custom Dates